


Hello Canada, why have you been hiding these no-bake Nanaimo bars for so long? If you're like me and haven't heard of Nanaimo Bars, get ready for them to quickly become your favorite no-bake dessert.
So Nanaimo bars, have you heard of them? I was pretty in the dark about them until recently when I discovered them in Ruth Mar Tam's new cookbook, Baked to Order. I've followed Ruth on Instagram for quite some time now and her cookbook is a great buy! She has a heavy baking focus on sourdough and laminated pastries. Her book is a good mixup of both categories and since she is such a good follow on Instagram, I figured the book would be well worth the purchase.
I feel like I've seen these bars over the years but haven't thought much of them. It turns out they are pretty popular in Canada and somewhat of a delicious secret.
Nanaimo Bar Recipe
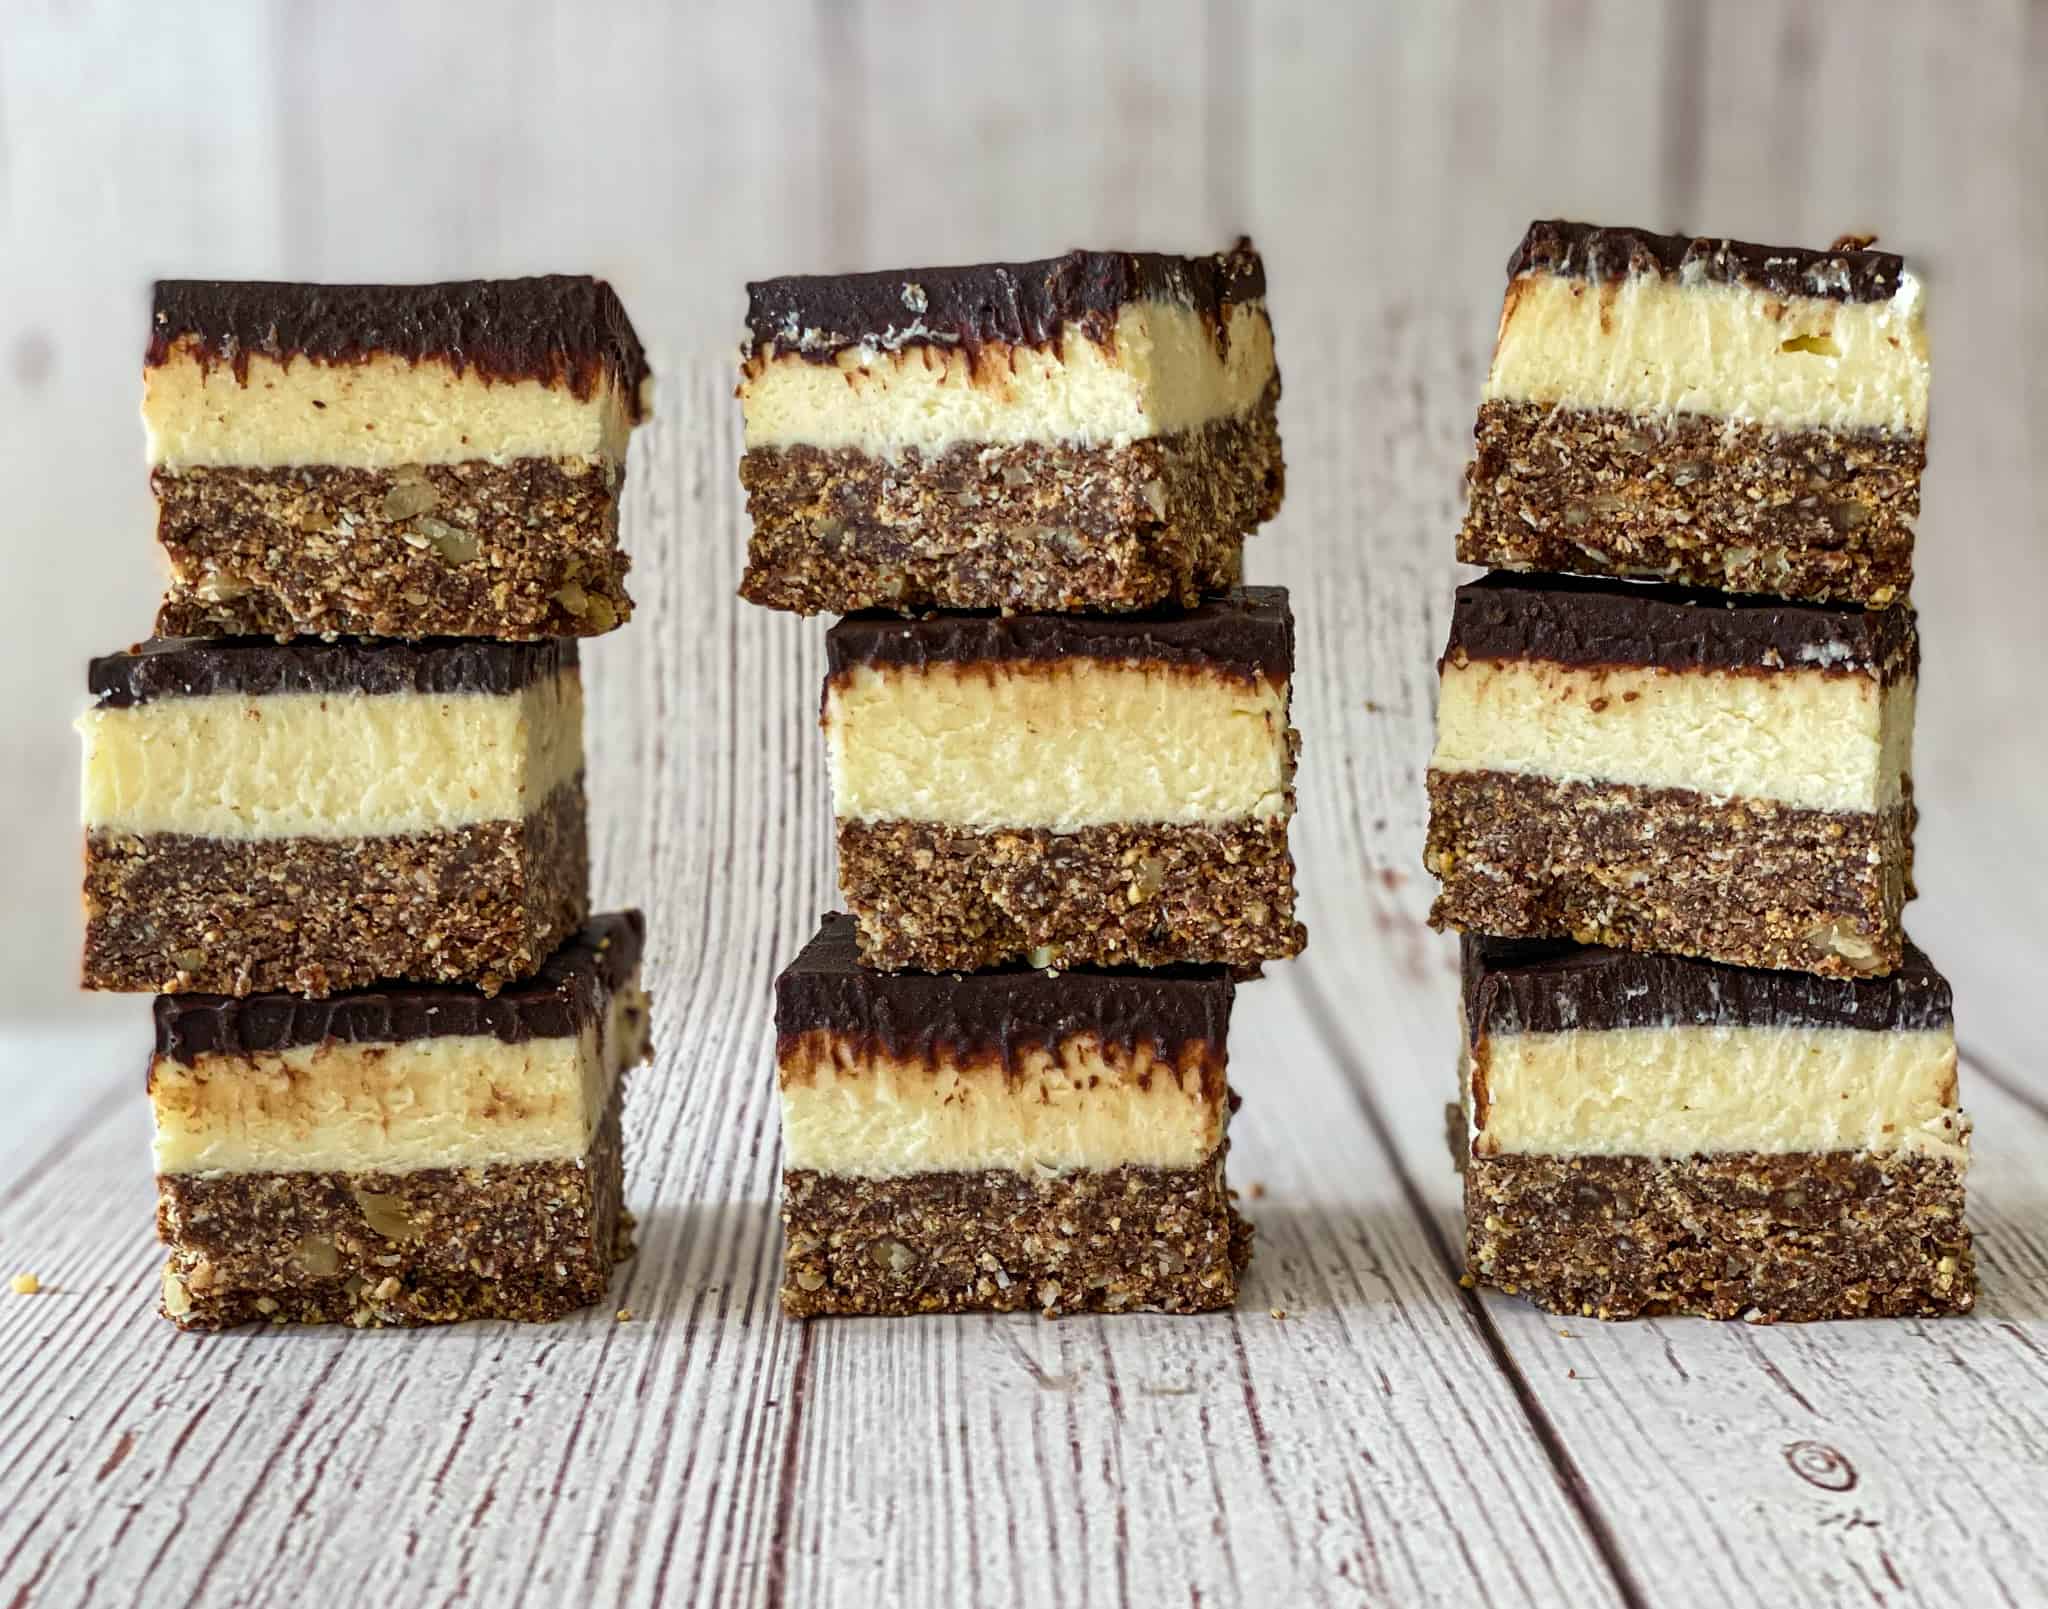
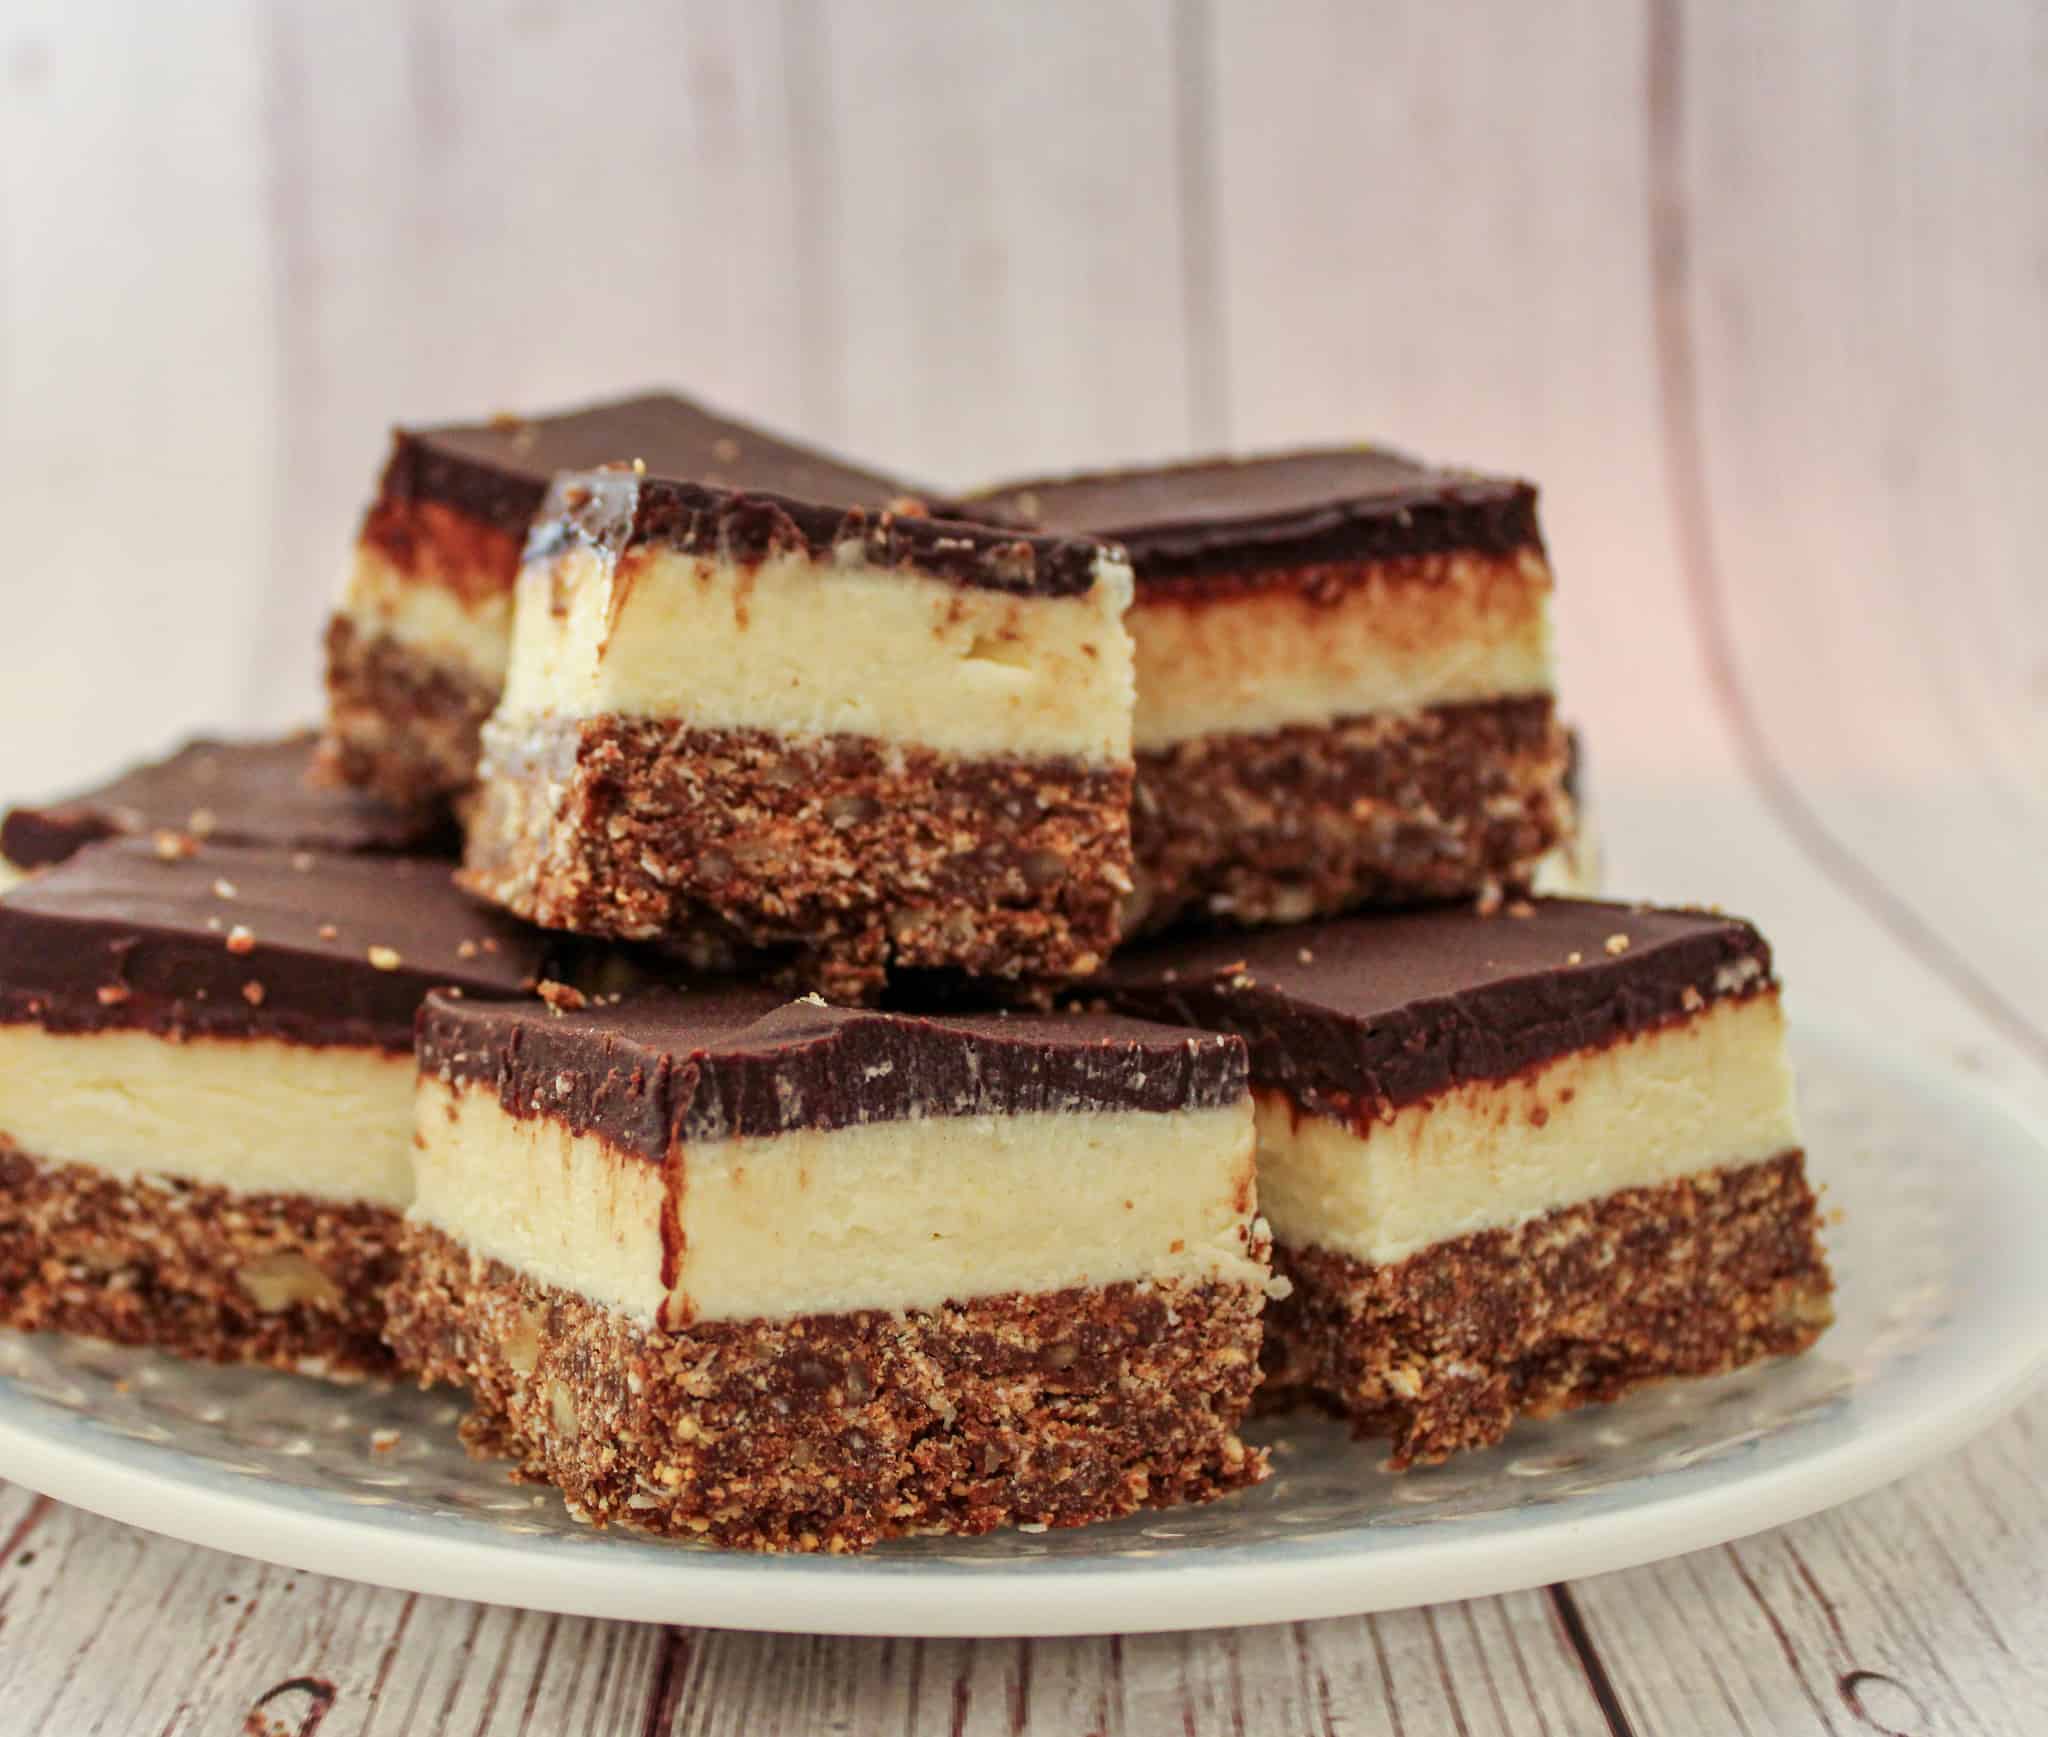
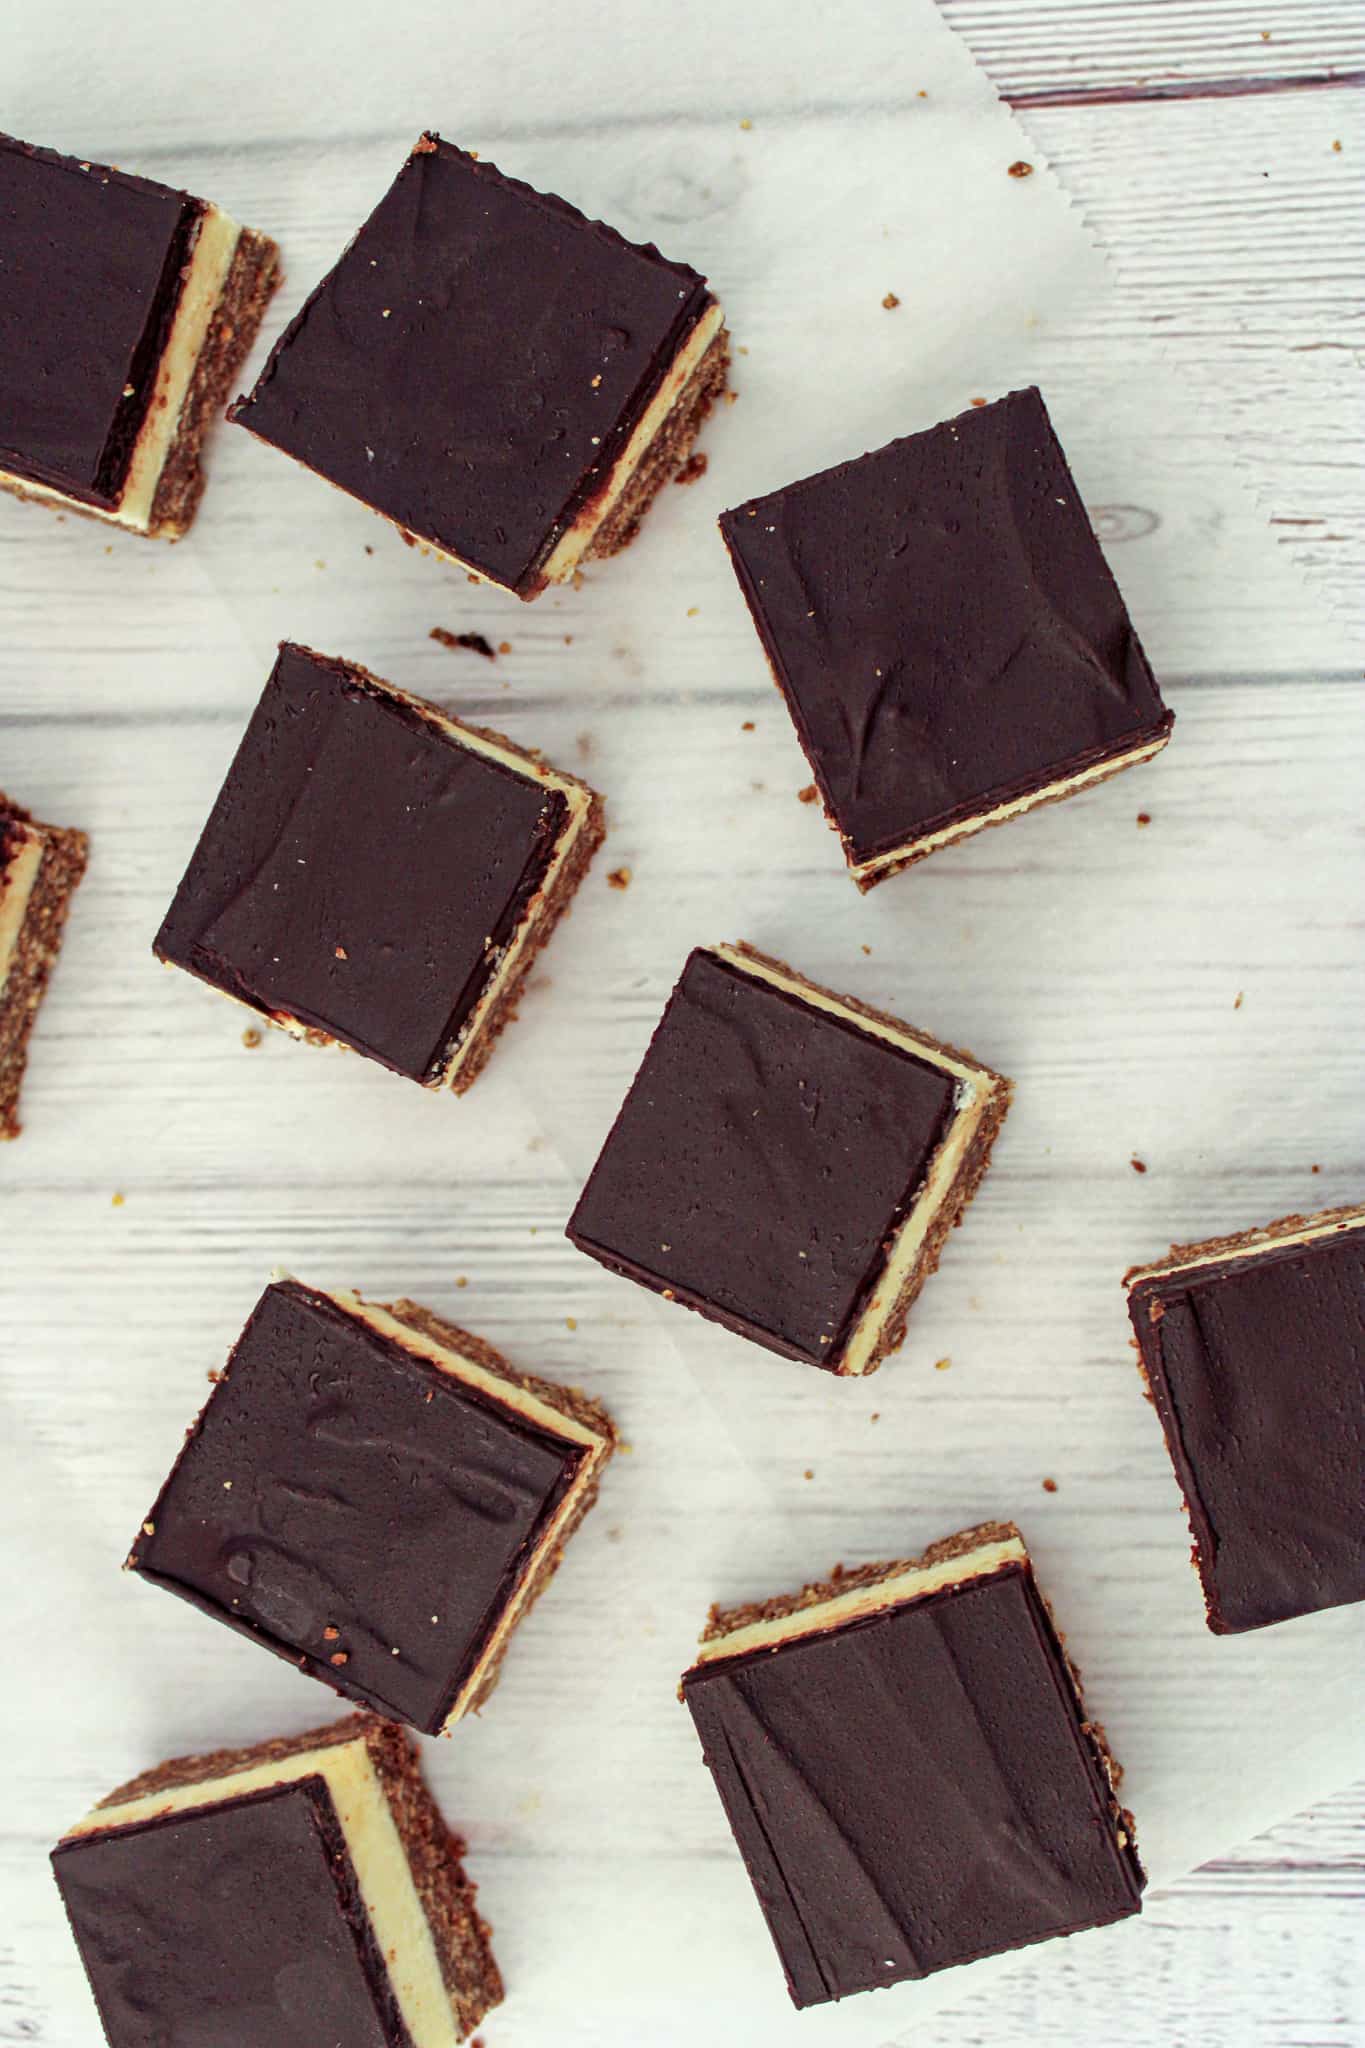
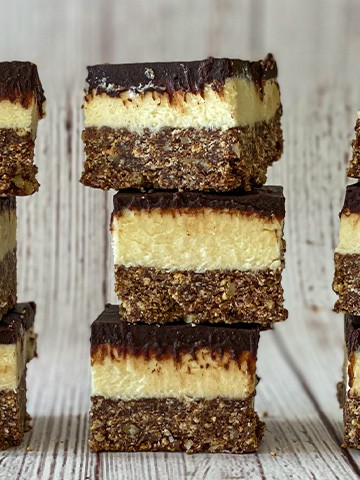
The bars are made with three distinct layers. The bottom layer is the crunch, basically a chocolate biscuit layer. It's made using a combo of graham crackers, coconut flakes, walnuts, and cocoa powder. The graham crackers, coconut flakes, and walnuts get mixed in with a melted butter and chocolate mixture, kinda being cooked (okay, so a little baking in this no-bake recipe), and becoming super crunchy in the process. That layer then gets put in the freezer to chill and come together.
Then comes the second layer. The second layer is a creamy custard filling. Now in Canada, they use Bird's Custard to get that traditional yellow coloring. Unfortunately, I couldn't find that brand at the time and had to settle for the super American Jell-O pudding mix. Sorry, Canada! I was still able to get a slightly yellow tint, but not the traditional color like in Ruth's picture.
The jello mixture gets combined with butter, powdered sugar, and some heavy cream (not going healthy on this one!). It's basically like a really thick frosting. The custard gets set right on top of the crunchy layer and then heads back into the freezer
Alright, we're at the final layer and definitely the most simple one. The top layer is just a plain layer of chocolate. It's similar to a chocolate ganache, so it's super creamy and creates a nice top for the bars. That layer gets added to the other two and then goes back in the freezer once again to get a nice shell and hard topping.
No-Bake Dessert Recipe
So that's the Nanaimo bar! They don't require any baking but still take some time to make because of all of the time setting up in the freezer. Because they are no-bake and basically set up in the freezer, they are easy to keep in the freezer for about 3 months after you make them.
Ingredients To Make Nanaimo Bars
Cookie Biscuit Layer
- Graham cracker crumbs
- Dried coconut flakes - Shredded
- Walnuts - toasted
- Butter
- Kosher salt
- Cocoa powder
- Egg - lightly beaten
- Vanilla extract
Custard Layer
- Butter - unsalted at room temperature
- Custard powder - Vanilla pudding mix works great too
- Salt
- Powdered sugar
- Vanilla extract
- Heavy cream
Chocolate Layer
- Chocolate - Good quality, finely chopped
- Heavy cream
- Butter - unsalted
How To Make Nanaimo Bars
1. Prepare the pan: Prepare a 9x9 baking pan with parchment or foil, lightly grease and set it to the side.
2. Make the cookie layer: In a large bowl, combine the graham crackers, coconuts, and walnuts. Set to the side. Then, melt the butter, with the cocoa powder, sugar, and salt. Remove from the heat and add in the whisked eggs and vanilla, constantly mixing to avoid the eggs from curdling. The mixture might look funny, but follow the process and it will look like thick hot fudge. Combine it with the cookie mixture. Add the chocolate cookie mixture to the pan, smoothing it down. Place in the freezer for about 45-60 minutes for it to set.
3. Make the custard layer: In a medium-sized bowl with a hand mixer or a stand mixer with a paddle attachment, mix the butter, pudding mix, and salt. When the mixture is light and fluffy, add in the powdered sugar, followed by the vanilla and the heavy cream. Spread the mixture over the chocolate mixture and place back in the freezer for 20 minutes.
4. Make the chocolate layer: Set up a double boiler on the stove and place the chocolate, butter, and cream in a heat-proof bowl. Slowly mix in everything together until smooth. Remove the bowl from the heat and pour it over the custard layer. Place the bars back in the freezer for about 20-30 minutes to set.
5. Serve and enjoy: To get a clean cut of the bars, use a sharp knife that has been run under warm water. It will allow the bars to be evenly cut.
How To Store The Nanaimo Bars
The bars will keep up to two weeks in an airtight container and 3 months in the freezer.
FAQs
If you cannot find custard powder, a vanilla pudding mixture will work just fine. It gives the bars the same type of texture for the creamy custard layer.
The bars got their name from the city of Nanaimo in Canada. They are a famous Canadian dessert that gained popularity after being served at Expo 86.
Yes! The custard layer is the perfect base layer for different flavors. Some great adaptations to include would be mint, coffee, or peanut butter.
Check out the recipe below. You'll be happy that you are finally in on this Canadian secret.
No-Bake Nanaimo Bars
Ingredients
Method
- Line a 9x9 pan with parchment or foil. Lightly grease the pan and set to the side.
- Make the cookie layer. In a large bowl mix together the graham crackers, coconuts, and walnuts. Set aside. Then in a small saucepan, melt the butter over low heat. When the butter looks soupy, add in the cocoa powder, sugar, and salt, whisking to combine. Make sure it is smooth, and remove the chocolate mixture from the heat. Once off the heat, add in the whisked egg and vanilla, constantly mixing to avoid the egg from curdling. When the mixture looks like it's come back together, place it back on low heat and continue to mix until smooth. The mixture should look thick, like hot fudge. This will take about 2 minutes. Once the mixture is ready, pour it over the graham cracker mixture and fold it in completely. Once the mixture is fully together, press it down into the pan using any extra parchment or the bottom of a glass to get a smooth layer. Then place it in the freeze for about 45-60 minutes until it is set together.
- While the cookie layer is setting, make the custard layer. In a medium-sized bowl with a hand mixer or a stand mixer with a paddle attachment, mix the butter, pudding mix, and salt. Cream everything together for about 3 minutes, until fluffy. Then gradually add in the powdered sugar. Do this slowly so you don't make a powdered sugar cloud and make a mess! Then add in the vanilla and the heavy cream, and let it mix until smooth. You want the mixture to be smooth, but spreadable. If needed, add in more heavy cream. Spread over the cookie mixture when ready and place back in the freezer for about 20 minutes.
- To make the chocolate mixture, set up a double boiler on the stove and place the chocolate, butter, and cream in a heat-proof bowl. Slowly mix in everything together until smooth. Make sure to consistently stir the mixture, so it has a smooth texture. Remove the bowl from the heat and pour over the custard layer, making sure to fully cover everything. Let the mixture chill for about 20-30 minutes in the freezer until the chocolate is fully set.
- The bars will be ready after the top layer is set. They do get a little melty with the chocolate layer, so just plan on serving them accordingly. To get a clean cut on the bars, use a chef's knife and run it under warm water first allowing it to slice into the chocolate evenly. The bars will keep up to two weeks in an airtight container and 3 months in the freezer.


colin cooke says
Beautiful!!